Calla is a flower from the Aroid family. The composition of the genus was revised many times, which is why some of the ornamental plants from this family in floriculture began to be designated by the same name. Today, under the name "calla" one can find its relative zantedeschia. It is the Ethiopian zantedeschia that is most often sold as a potted plant or for cutting. The flower is also often referred to as "calla" because of the characteristic white veil on the inflorescence.
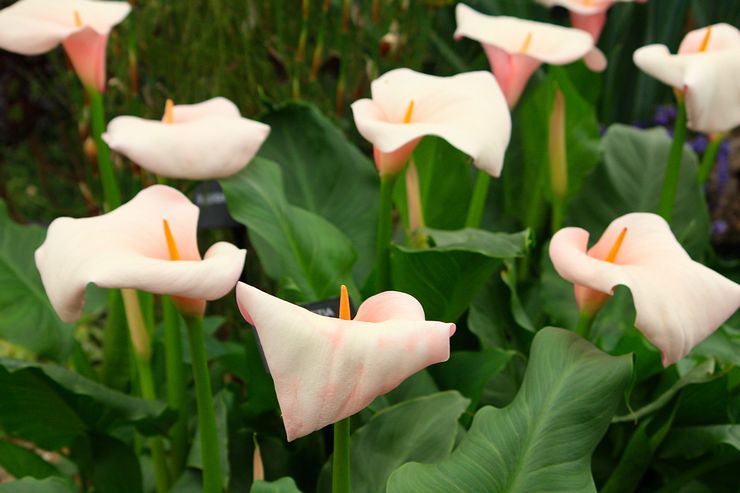
Calla lilies can become a real pearl of the garden due to their high decorativeness. Their ornate foliage and striking flowers attract attention and adorn any landscape.
Description of garden calla lilies
Calla flowers live in the wetlands of the African continent, but are also found in South America. Of these plants, only the marsh calla lives in more northern latitudes. You can meet him in the swamps and along the flooded shores.
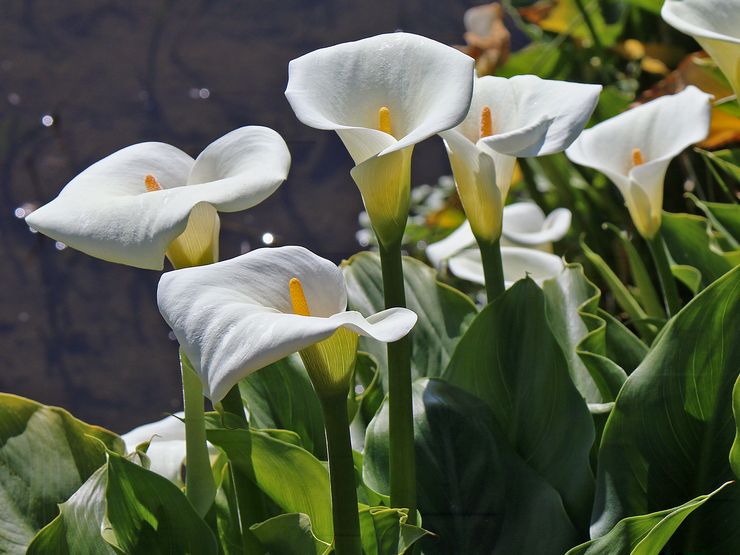
The real calla flower is a yellowish ear-shaped inflorescence. Despite its modest appearance, the small flowers located on it exude a pleasant aroma. A spectacular snow-white or colored cover of a plant that wraps around an ear, in fact, is just a bract leaf. The decorativeness of the inflorescence lasts about a month. You can grow such a bush both at home, in a pot, and in flower beds. Calla lilies are notable for their large "flowers" and bright green foliage.
Features of growing garden calla lilies
Wherever calla is grown, it will need proper care. At the same time, some features of the flower are considered the same for both garden specimens and indoor ones.
- All parts of calla lilies contain toxic substances, its juice should not get on the skin, so the plant should be handled more carefully. At home, flowers are kept away from children or animals.
- Calla is one of the barometer plants. Before precipitation, the flower reacts to an increase in moisture levels by forming droplets at the ends of the leaves.
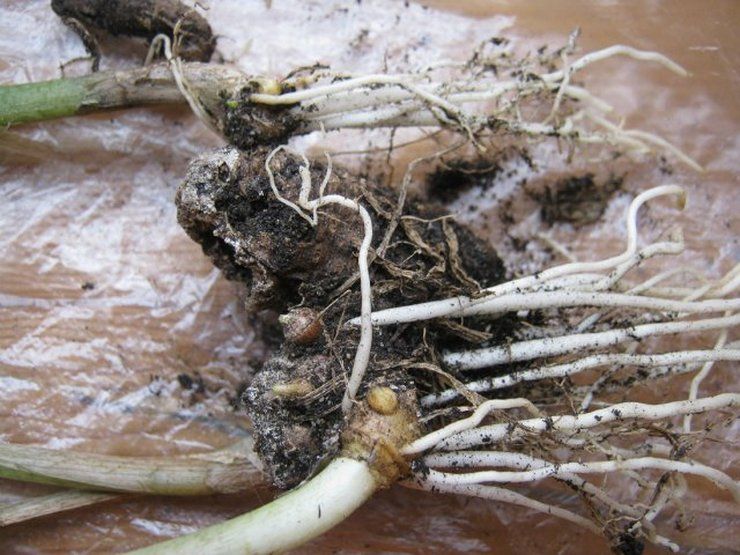
- Different types of plants can develop from rhizomes or from tubers. But they are all quite fragile, so they should be dug out as carefully as possible.
- When planting calla lilies, you should not bury it. The roots of the plant are covered with earth only a little. This will allow them to get enough air and protect them from decay.
- At the beginning of growth, calla lilies directs all the growth energy to root development, so the appearance of its seedlings can be expected for a long time - about a month.
- Homemade calla lilies should be planted in porous pots, such as ceramic ones. Such dishes evaporate moisture better.
- Ethiopian calla lilies prefer to grow alone in a pot.
- Periodically, the top layer of soil in a container with calla lilies should be changed.During this procedure, you should carefully remove a few centimeters of the old soil from the pot and replace it with a new one, being careful not to hurt the rhizomes.
- Growing garden calla lilies will require a spacious area that is open enough, but protected from too bright midday rays. As a rule, plants are placed near large shrubs or trees that can slightly shade them.
- The soil for planting must be nutritious. Its reaction can be acidic or slightly acidic. The drainage layer also plays an important role. Despite the plants' love of moisture, their tubers or roots should not be constantly in the water. Most often, a mixture of sand with peat, humus and leafy soil is used for calla lilies.
Planting calla lilies in open ground
The choice of planting material
When choosing a variety of garden calla lilies, you need to consider several different options and decide on the most suitable one, which you will like the most in appearance and suitable for growing conditions. The most popular and widespread varieties among flower growers are calla "Ethiopian" and "Rehmanni". These varieties are considered very capricious, but they have all the decorative qualities. Large, eye-catching flowers rise on the stem at a height of about one meter and bloom for a long time.
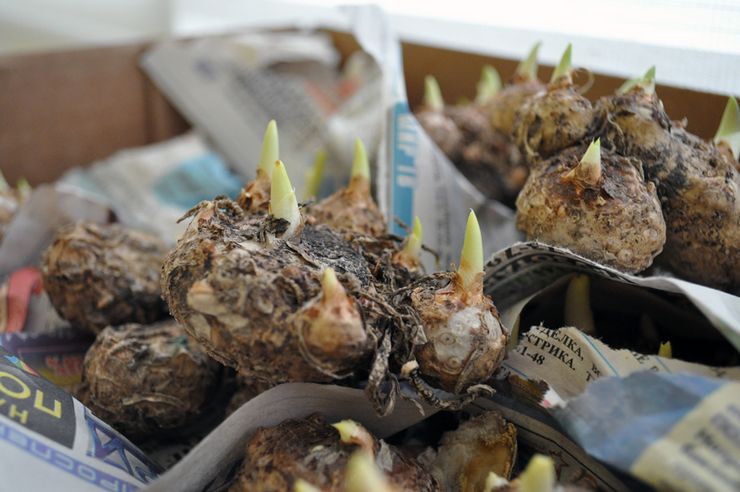
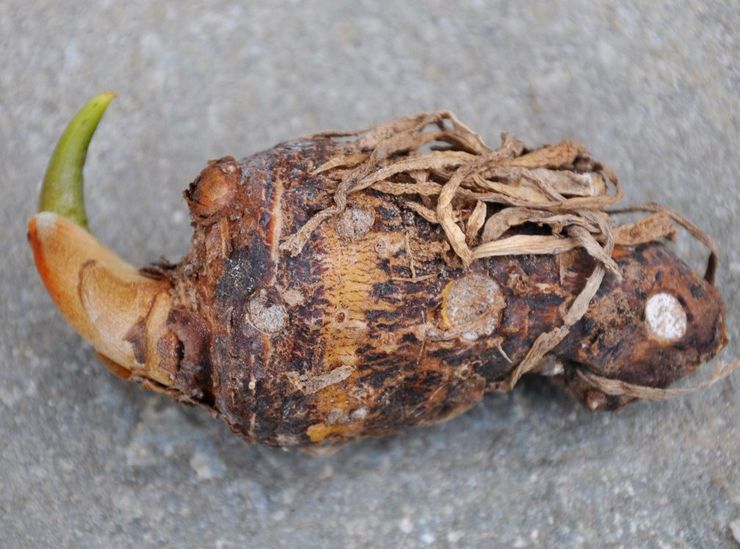
Sprouting tubers
Garden calla tubers are pre-planted for seedlings. This method is considered to be more efficient. Germination can be started in early spring (around the end of March). For planting each tuber, you must choose an individual small flower pot or a large container for all planting material. The soil mixture is suitable for universal, intended for flowering indoor plants or seedlings. It is necessary to water the plantings regularly 2 times a week.
Sprouted tubers are recommended to be subjected to hardening procedures, starting about a week before transferring the tubers to an open area. To reduce the risk of stress in plants during transplanting and to preserve the root part, it is recommended to use a transshipment method with full preservation of the earthen ball.
Landing rules
Calla lilies are planted on prepared beds in May, when frosts have passed. Before planting, the tubers must be prepared by holding them for about half an hour in a solution of potassium permanganate. After processing, they are carefully examined for lesions. Such areas should be cut off, and the cuts should be covered with greenery and dried. If the tubers are dry, they should be wrapped in a damp cloth for a couple of days until they become dense again. In addition, before planting, you can treat them with specialized fungicides. This will protect the plants from infection.
On the garden plot, it is recommended to choose only sunny planting places for calla lilies or, in extreme cases, partial shade. Flowers love warmth and abundant light, and even in a slight shade, their growth and development changes slightly in the negative direction. Although these whimsical flowers can get burned by the scorching sunlight at midday, it is better to shade their leaves during this period. The landing site should not be in drafts.
It is desirable that the soil is fertile and with a low level of acidity. Before planting, the earth should be well dug up, along the way introducing the necessary nutrients into it. A complex mineral composition is suitable (about 35 g per 1 sq. M). For tubers, holes are prepared with a depth of about 5-10 cm, maintaining a distance between them of about 30-40 cm. Tubers are placed in the holes, covered with soil and the garden is watered abundantly. It is not recommended to strongly compact the soil on the surface of the planting hole. After that, watering is stopped for about a couple of weeks.
The emergence of sprouts will take some time - do not dig up the flower bed to make sure the tubers are viable. Until the calla grows roots, seedlings will not appear.Usually, the sprouts begin to hatch 2 weeks or even a month after planting.
Garden calla lilies are not planted before winter: the plants do not hibernate in the open field.
Caring for garden calla lilies
Garden calla lilies are not too demanding to care for. They require regular watering and shallow soil loosening. The amount of watering should not be too large. With the exception of hot and dry days, flowers are watered sparingly, 1-2 times a week.
To maintain the soil acidity level that is optimal for garden calla lilies, additional watering with citric or acetic acid is recommended. An acidified solution of ten liters of water and one tablespoon of acid is added to the soil 2-3 times during the summer.
A calla bush growing in the garden is capable of forming up to ten peduncles. If the seeds from the plants will not be collected, after greening the covers of the flower arrows should be removed - this will contribute to the development of plant roots and longer flowering. Young shoots should not be touched at the same time. They almost do not affect flowering, but they add splendor to the bush.
If fertilizers were applied to the soil before planting, the bushes will not have to be fed throughout the season: they will have enough nutrients. If no top dressing was applied, once every 2-3 weeks, the bushes can be watered with formulations for corms. Potassium supplements can be added during flowering and excess nitrogen should be avoided. Insufficiently acidic soil can be slightly acidified a couple of times over the summer by adding a small amount of citric or acetic acid (1 tbsp. L per 10 l of water) to the water. If the soil does not contain humus, you can use calla lilies and organic matter for feeding - for example, mullein infusion (1:10).
Calla after flowering
Tuberous and rhizome species require different handling after flowering is complete. Plants with rhizomes rest in summer, during the most intense heat. These calla lilies gradually slow down their growth rates, and their foliage begins to turn yellow. At this time, indoor plantings begin to be watered less often and less, and the pots with flowers themselves are taken out into the open air, having chosen a place protected from rain for them. In the first weeks of July, you can transplant by clearing the bushes of old shoots and leaves and changing the soil in the container. After transplanting, the flowers are placed in a bright corner, not forgetting to water and feed them. Garden plants in the fall must be removed from the ground along with a lump of soil and stored for the whole winter. A cool and always dry place is suitable for this.
In tuberous plants, after flowering, the bedspread begins to turn green and wither. Foliage then turns yellow and dies. If tuberous calla lilies grow outdoors, they are dug out of the ground at the end of September. The nodules are cleaned of soil without touching the leaves, and kept in a cool corner (at least 5 degrees, but not more than 10 degrees) for about a couple of weeks. During this time, all nutrients will have time to transfer from the aerial part to the tuber itself, after which it will be possible to completely remove all dried foliage and dead roots from it.
Keeping calla lilies in winter
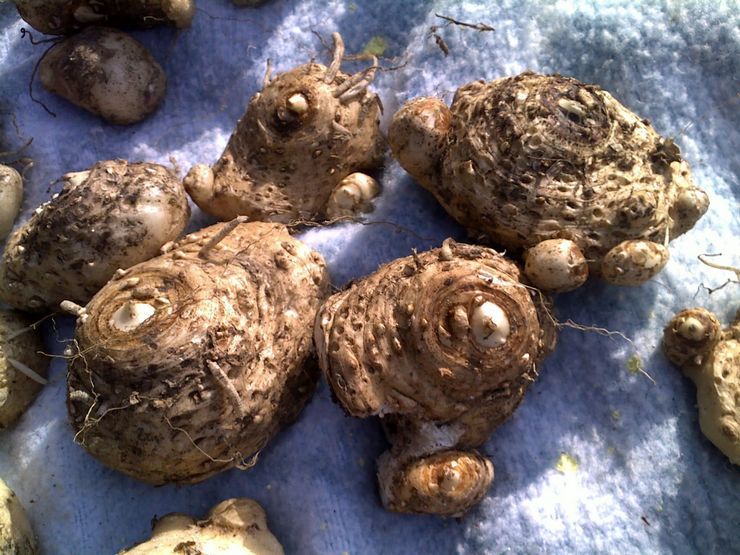
Calla lilies are able to overwinter in the beds only in warm regions with mild winters. In more northern regions, flowers are dug up with the onset of autumn. After removing the dry foliage, the tubers are washed and kept in a potassium permanganate solution for about half an hour. Then they should be washed again and kept in the shade until completely dry. The tubers prepared in this way are kept in individual paper bags in a fairly cool corner. You can also put them in the refrigerator, in the vegetable compartment.
The extracted rhizomes are also kept cool. After drying and removing the foliage, they can be placed in the same place as the tubers. The planting material should be checked periodically. In a room that is too warm, the roots will dry out, and too high humidity can cause rot.
If you leave the home calla bush without rest, constantly stimulating its growth, the calla will stop blooming.The dormant period of indoor specimens begins in the last weeks of autumn and lasts until early spring. Before going to rest, the leaves of most species begin to wilt, and their covers turn green. After complete drying, the leaf blades must be cut off. Plants should spend the winter in a cool place such as a balcony or veranda. The tubers can be left in the pot or removed and placed in small-hole bags. Together with the tuber, a little sawdust is poured into such a bag. Planting material will not need watering.
Rhizome species grown at home rest in the summer. Containers with them are transferred to the street, sheltered from rain and sun. For this period, calla lilies can be transplanted into the ground, under trees, and returned to the pot in the fall.
Breeding methods for garden calla lilies
Garden calla can multiply by dividing the rhizome, baby tubers and seeds.
By reproduction by dividing the bush
By dividing the bush, you can propagate rhizome calla lilies, for example, Ethiopian. This procedure is carried out in the fall. The plant is dug up and the offspring, which have a growth point and part of the root, are separated from it. This procedure helps to rejuvenate the bush. The resulting cuttings are planted in containers filled with suitable soil. They can be transferred to open ground in the spring, when the roots give fresh shoots.
Reproduction by dividing the rhizome
Tuberous varieties are divided in the fall or just before planting. Overgrown tubers weaken the plant and it may even stop blooming. Daughter nodules are broken off without the use of tools. Sections must be dried, and then treated with brilliant green. Each division should have at least 1-2 buds of its own. Tubers less than 1.5 cm in diameter will need growing. They are planted in light soil and kept warm.
Growing from seeds
The seed method takes the longest time and is considered rather unreliable. Before planting, the seeds should be soaked for about 6 hours in a stimulant, for example, in potassium humate. Then they are kept in a warm place for about a week on a pallet with a damp cloth. It should not dry out. Sprouted material is sown in containers and kept warm, and transferred to the ground only after germination. At home, artificial pollination will be required to obtain seeds.
Growing calla lilies in a pot
Forcing rules
Calla tubers can be purchased starting in February. Healthy planting material should be strong and dense. Such tubers will be able to bloom this year. They usually start disembarking in April.
For growing calla lilies, a container with a diameter of about 25 cm and a volume of about 3 liters is suitable. It is filled with soil containing peat, sphagnum or sawdust. The acidity of the soil should be about 6. Tubers with a diameter of about 6 cm are best suited for cultivation. They are placed at a depth of no more than 5 cm, placing them upside down. After planting, the soil in the pot is watered with a fungicide solution.
There is a way to stimulate flowering and enhance the color of calla lilies. For this, the night temperatures should be relatively low (about 16 degrees), and the flower should spend the day in diffused light. If forcing is done in winter, the plant will have to be highlighted in order to achieve at least 10 hours of daylight hours.
Correct feeding will also help to enhance flowering. For this, a liquid complex composition is suitable. It is added to the water every 5th watering. It is recommended to fertilize tuberous varieties only in the first three months after sprouts appear on them.
Features of the content
Indoor calla is a non-capricious flower. He will only need periodic watering with soft filtered and settled water. The plant should not be poured too much - the tuber may begin to rot. But the bush will appreciate the high humidity. It is especially important for white calla lilies. You can spray the air next to the flowers or put the pots with them on a pallet with damp pebbles. The foliage of plants should be regularly wiped from dust.
In the summer, the bushes will develop well at a temperature of at least 22 degrees. Calla is able to withstand extreme heat or a short period of cooling up to 8 degrees, but it will not be able to bloom in such conditions. In winter, it is kept cool: at this time, the dormant period begins in calla lilies and the aboveground part of most species dries up.
The flower will need a sufficiently sunny place, although the foliage should be protected from direct rays. Bushes can be kept on any windows except the north ones. In addition, calla lilies should be protected from cold drafts.
Types and varieties of calla lilies with photos and names
Calla lilies include 8 different species, of which only three are most famous. They are also usually used to obtain more decorative hybrids.
Calla Ethiopian (Calla aethiopica)
The species forms tall bushes with meter-sized peduncles. Calla aethiopica has an underground rhizome. This is a moisture-loving plant with shiny, rich green foliage, which retains its decorative effect, even while the bush is resting. The cover of the inflorescence is white. Famous varieties include:
- Pearl - a more miniature variety, reaching up to half a meter in height. Good for home growing.
- Green goddess - large calla lilies up to 90 cm high.
- Nikolay - forms high peduncles 1.5 m in size. The foliage is shaped like an arrow and is colored dark green. Each plate is located on a long petiole. The bedspread is painted green on the outside and below, and its dimensions can be up to 12 cm.
- Shene Zweibrokerin - forms meter stalks. The foliage is heart-shaped and light green in color. The lower part of the yellow bedspread is also colored green. Its dimensions can be up to 15 cm.
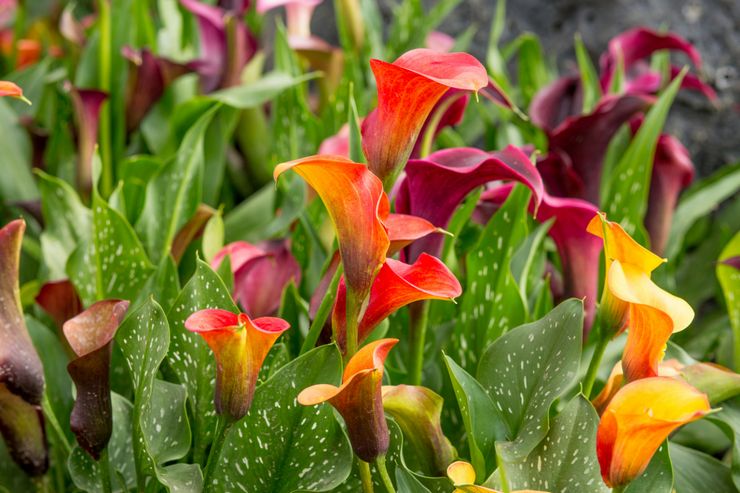
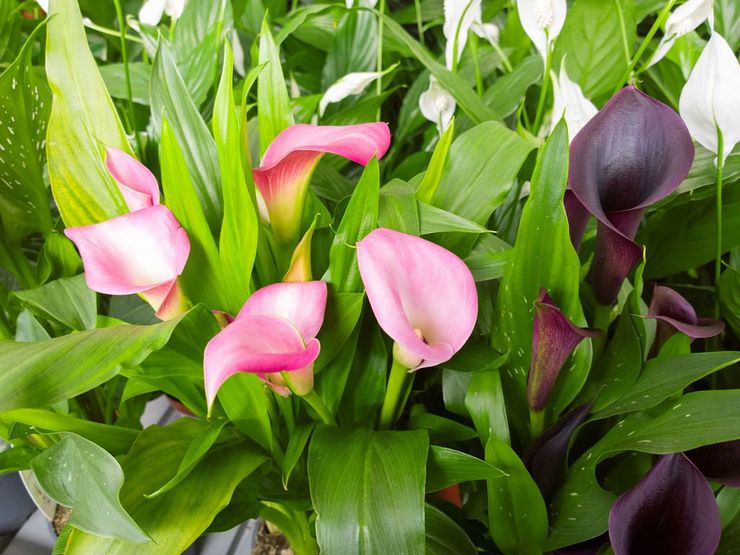
Calla rehmannii
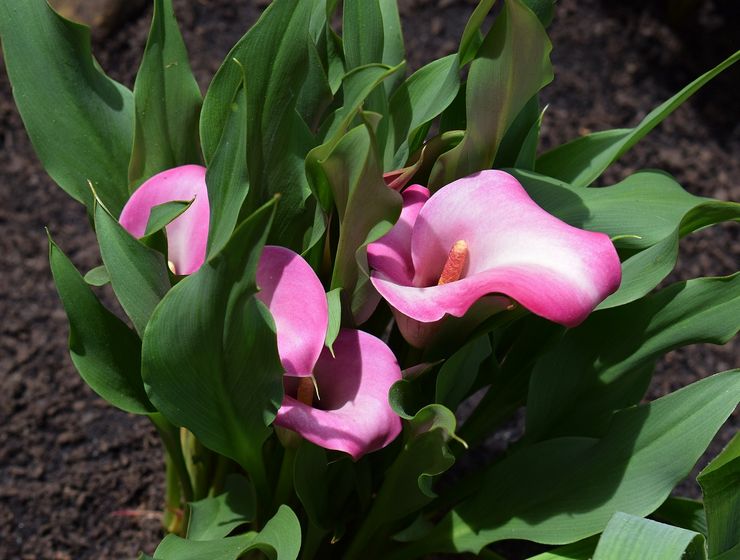
Compact view no more than 70 cm high. Calla rehmannii is distinguished by pink, burgundy or lilac color of the bedspread. The rhizome of such a calla is a tuber. Its foliage is narrow, light green. In autumn, the plant sheds leaf blades, and in winter it goes into a state of dormancy. Main varieties:
- The evening - forms a dark purple veil.
- Indian summer - has a red bedspread with a spectacular sheen.
- Chameleon - low bushes that can be grown at home. The bedspread has a delicate golden peach shade.
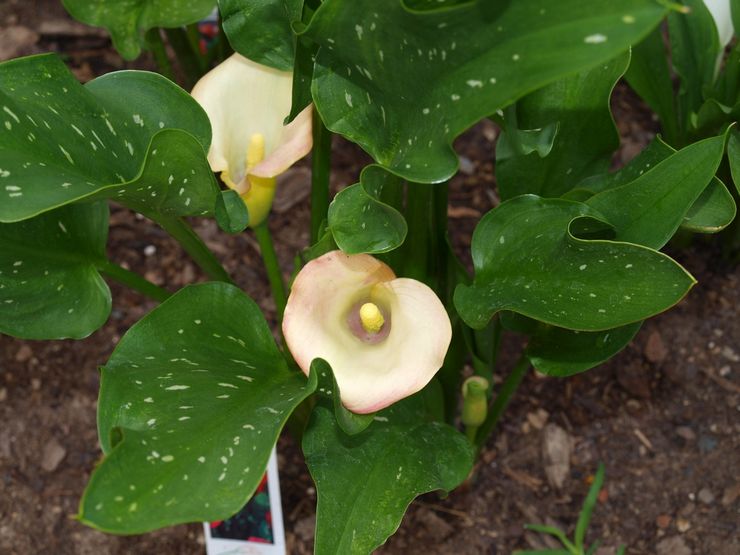
Calla elliottiana
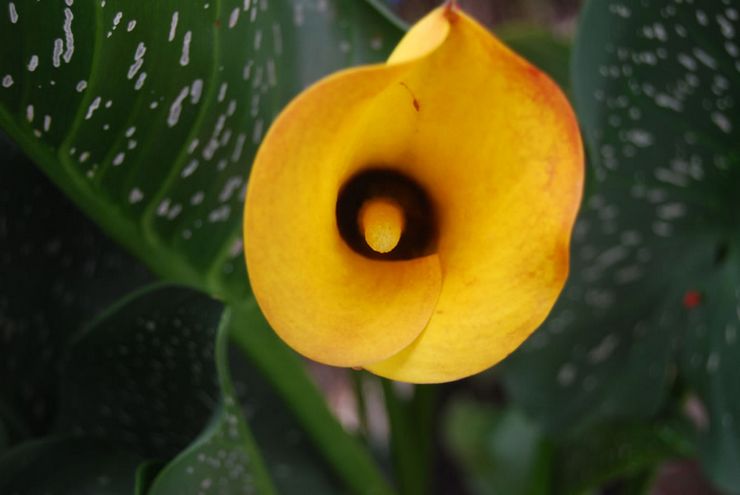
The species is distinguished by large, heart-shaped foliage with specks. The Calla elliottiana bedspread is yellow on the inside and greenish on the outside. The size of the bush is up to half a meter. Main varieties:
- Vermeer - the bedspread has slightly wavy edges, from the outside it is marble, from the inside - cherry with a purple sheen. The dark green foliage is adorned with light specks.
- Yellow corner - has a bright yellow bedspread and green foliage with yellowish specks.
- Black-eyed beauty - a cream blanket with a slight yellow tint, and in the very center, next to the cob, there is a dark ink spot. Light spots are present on the leaves.
Wild calla lilies, less commonly used in horticulture, include:
- White spotted - tuberous type with bedspreads of different colors and leaves with a light speck.
- Fragrant - Forms flowers with a white veil, exuding a sweet aroma.
- Powerful - it is distinguished by especially large inflorescences, the bedspread has a white color with a purple base.
- Joyful - endemic with a bedspread colored in different shades of yellow.


Please tell me how and with what plants calla lilies can be planted together, for example with roses, lilies, etc.