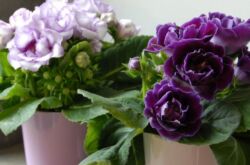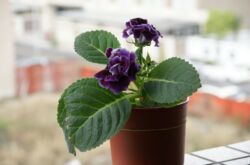
Gloxinia is a perennial indoor flowering plant that, with the onset of autumn and the arrival of short daylight hours, goes into a state of dormancy and remains in it until the end of February. As soon as the first spring sun warms up, the tubers begin to wake up and the flower comes to life. It is during this period that it is necessary to transplant the plant to a new place. The appearance of sprouts is a signal to start a transplant. In order for gloxinia to fully continue to develop in a new place, it is necessary to carry out all the preparatory measures necessary for this process.
The main principles of the transplant
Pot selection
The flower pot should be only 5-6 cm larger than the tubers in diameter. In a too spacious container, the flower will direct all its forces to building up the leaf and root parts, and the flowering process will be postponed to a later time. In addition, a large pot will contribute to waterlogging of the soil and dangerous retention of moisture near the roots.
Soil requirements
Gloxinia prefers light, nutritious, moisture-permeable soil with good air permeability. An excess of moisture and stagnation of water in the substrate is not recommended. This can lead to root rot. It is good if the basis of the soil is peat.
Every indoor plant lover always has a choice - to purchase a ready-made potting mix or prepare it yourself. Among the ready-made nutrient substrates, gloxinia is ideal for growing violets. True, for ease, it is recommended to add a little vermiculite or any other baking powder to it.
At home, flower growers can prepare a soil mixture from the following components:
- Option 1 - equal parts of fine river sand, humus, turf and leaf land;
- Option 2 - 3 parts of peat and leafy soil each, 2 parts of clean river sand.
For better adaptation of plants in a new place, it is recommended to add additional nutrition to the soil mixture in the form of humus or rotted manure. One liter jar of substrate will require 50 g of fertilizer.
Drainage layer
Drainage is very important for the quality growth and full development of plants. It must be placed on the bottom of the flower pot before planting. Also, the drainage layer allows you to set the required depth of the tank. As drainage, you can use crushed coal, expanded clay, small fragments of earthenware, river pebbles, small pieces of foam.
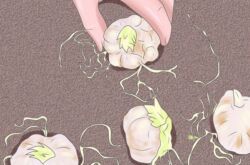
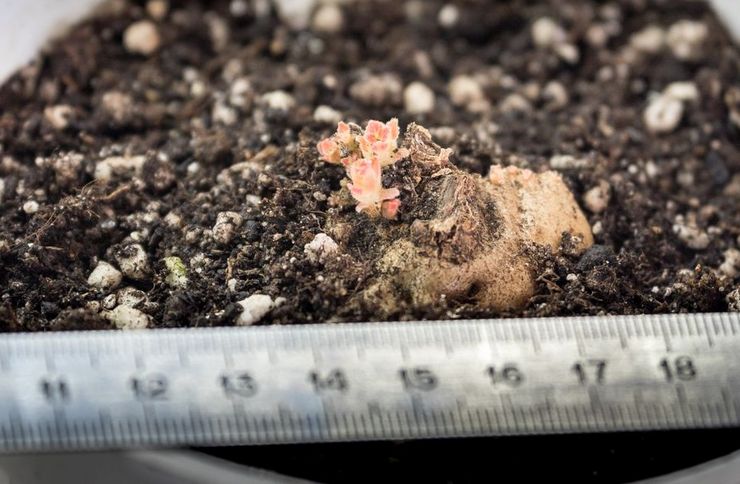
Tuber preparation

After preparing the flower container and potting mix, you can start preparing the tubers. First, it is recommended to remove them from the old pot, rinse thoroughly and remove dried roots. Rotten and damaged roots must be carefully cleaned with a knife and sprinkled with charcoal or activated carbon powder. And it is better, after stripping the roots, first to place the tubers in a special disinfecting solution (for example, based on phytosporin) and leave them there for at least 30 minutes. Such a preventive measure will protect the flower from root rot in the future.After soaking in a fungicidal solution, the tubers must be thoroughly dried for 20-24 hours, after which they will become suitable for planting.
A good quality and strong planting tuber must be firm and smooth. If the surface is flabby, then it is advisable to place it in a container with wet river sand for 2-3 days or for several hours in a stimulating solution.
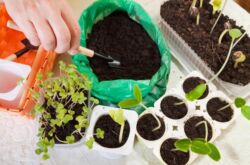
Features of planting tubers
When planting gloxinia tubers that have not awakened (without sprouts), it is very important to plant them in the right direction - future sprouts up. The tuber is buried in the soil approximately 2/3 of its height. The top does not need to be covered with earth. Immediately after planting, the soil is watered and the container is covered with a plastic bag, creating greenhouse conditions for the flower. It is recommended to keep the covered pot in a bright and warm room.
Tuber care consists of regular watering, as well as daily airing for 20 minutes. With the complete formation of two leaves, the plant begins to gradually accustom to normal indoor conditions. To do this, for 5-7 days, the bag is removed from the pot during the daytime, and put on again at night. After 5 days, the "greenhouse" cover can be removed completely, and soil mixture must be added to the flower pot with a young plant so that it covers the tuber by 1-2 cm.